最近在学习Spring、SpringMVC、Maven,想在Eclipse下构建maven项目,不过由于是第一次操作且Eclipse默认支持的创建
org-archetype-webapp需要修改许多的配置,所以望在此分享给大家,
1.引言
最近在学习Spring、SpringMVC、Maven,想在Eclipse下构建maven项目,不过由于是第一次操作且Eclipse默认支持的创建
org-archetype-webapp需要修改许多的配置,所以望在此分享给大家,可以让以后在构建的过程中不用花太多时间。
2.eclipse下使用maven构建SpringMVC
在eclipse官网下载的Eclipse IDE for Java EE Developers的版本默认是已经安装了m2e插件的,所以大家不需要去重新安装;
我使用的是maven3.3.3和Eclipse4.4.2
1)maven下载链接:maven3.3.3
2)eclipse下载链接:eclipse
3)如果eclipse下没有m2e的插件,可参考eclipse下安装m2e
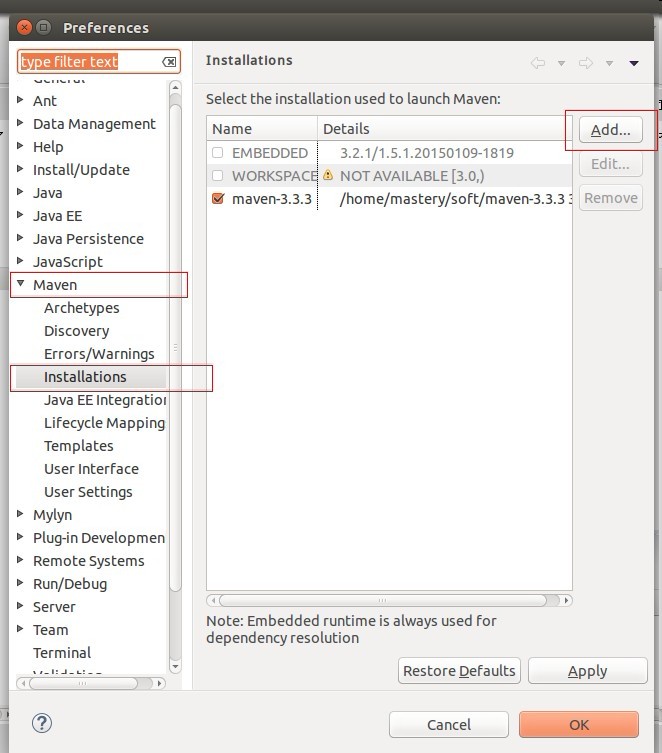
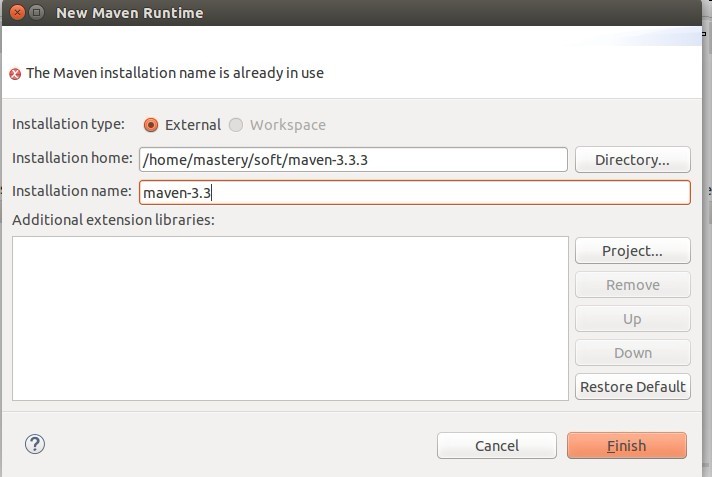
Notes:最后将eclipse中的maven版本配置成本地的maven,配置方式如下图:
在eclipse中点击Window->Maven->Installations->Add;之后添加自己本地的maven路径就行;
软件已经准备好了!那么我们开始构建maven项目吧!
maven构建web项目
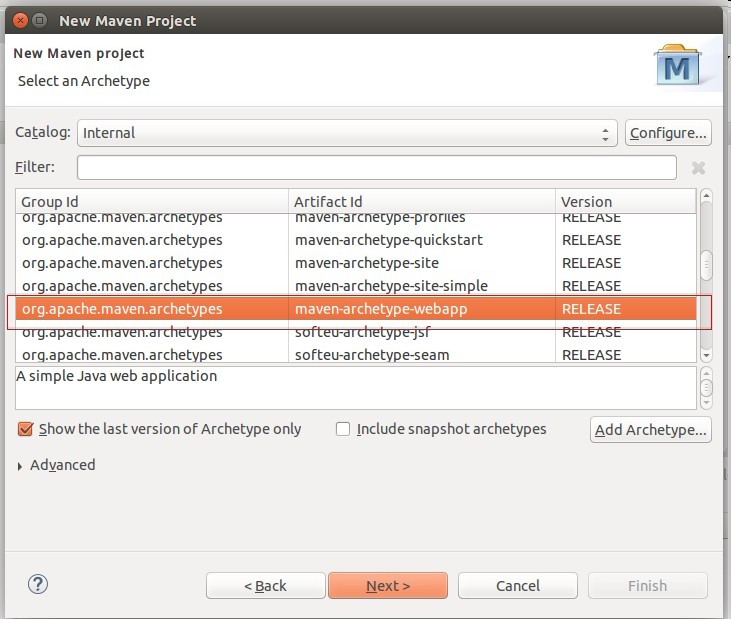
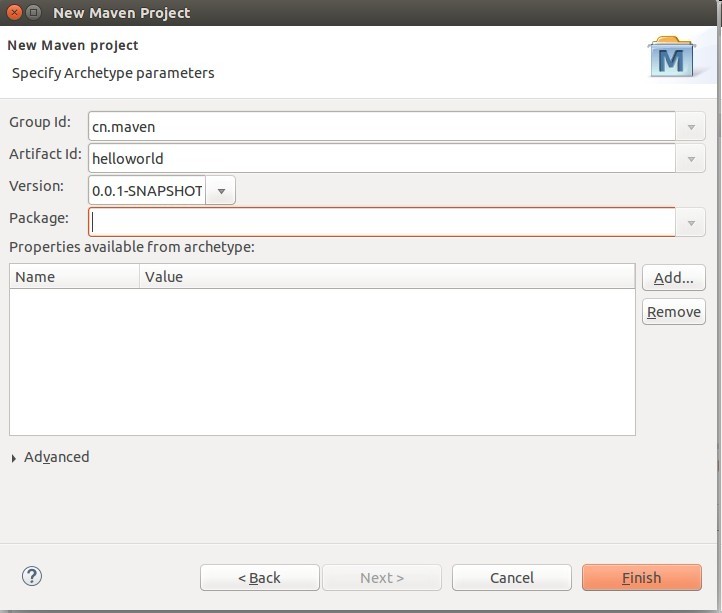
点击Eclipse上方的File->New->Other->Maven Project->Next->Next(这里默认就好)->选择maven-archetype-webapp->Next
->填写project信息->Finish
Notes:由于Eclipse创建的Maven项目默认的web版本是2.3的,且没有加入servlet的依赖包,而且可能
会没有`src/main/java`和`src/main/test`这两个目录,所以下面我们就来解决这个问题。
1)更改项目的默认jdk
右键项目根路径->点击Properties
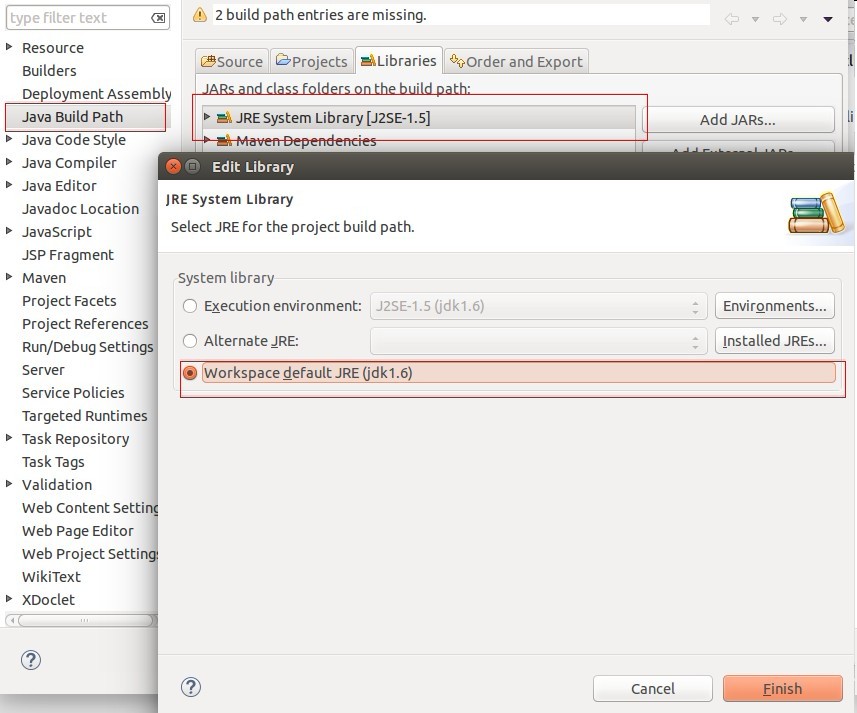
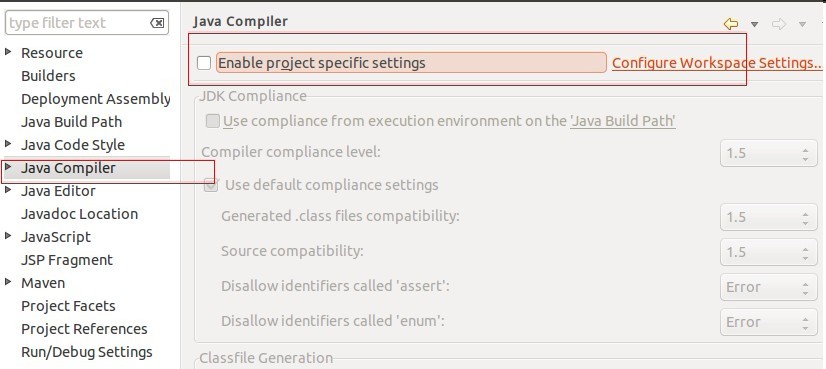

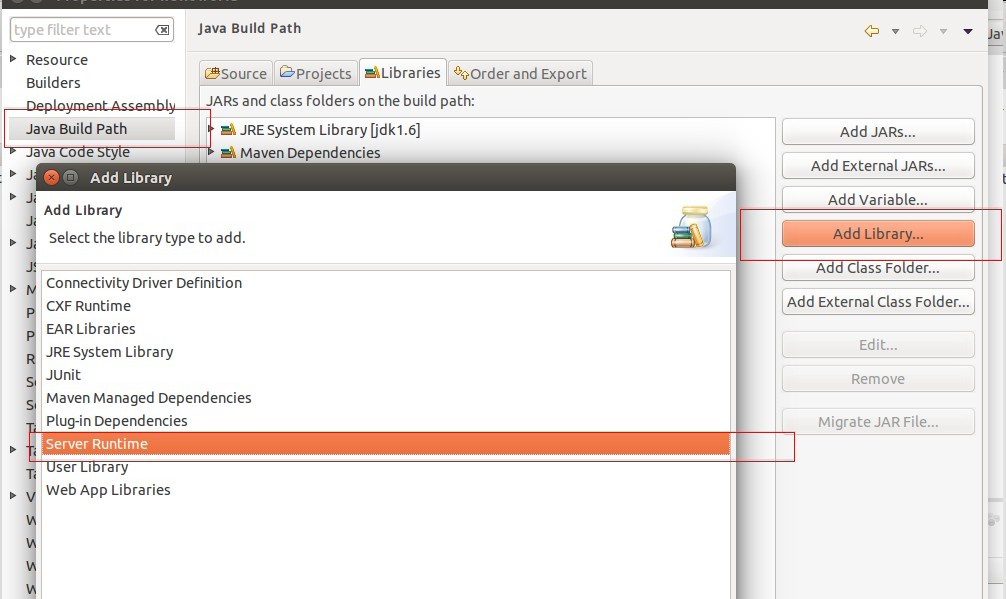
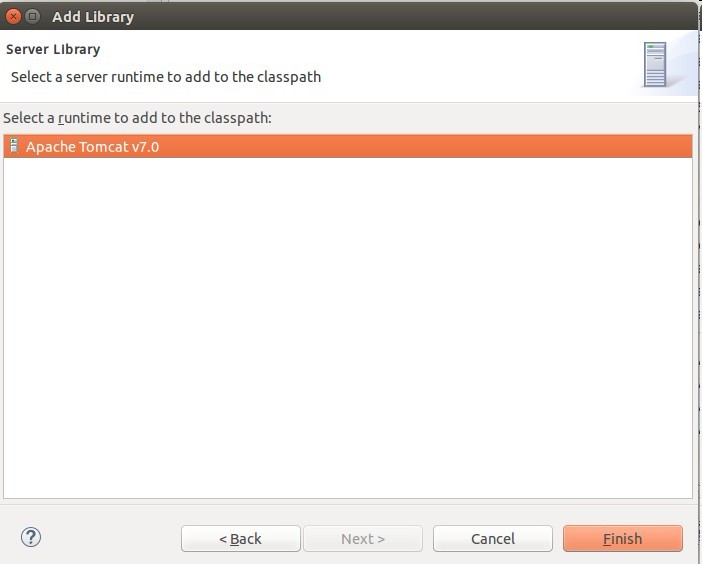
如果上一步的Server Runtime没有选项,则可以如下图配置tomcat为服务器
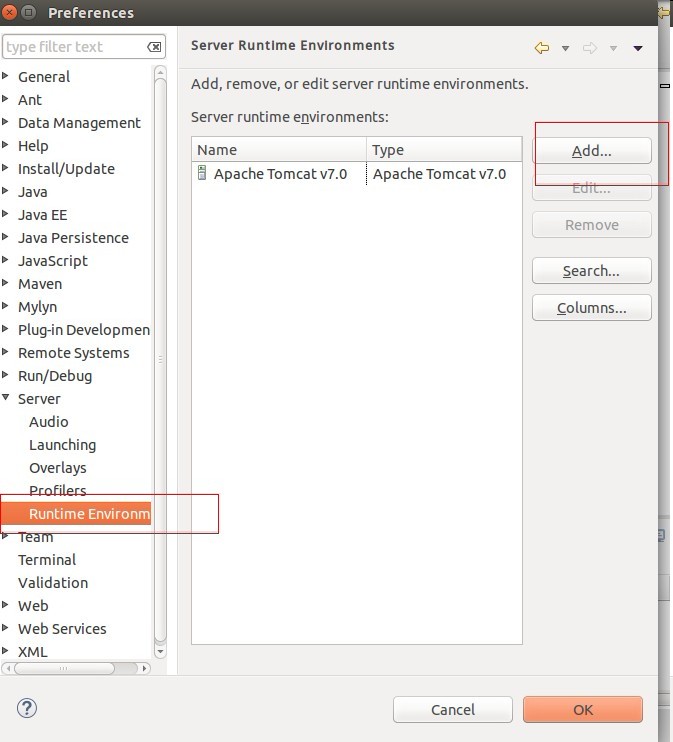
2)更改配置文件
切换视图为Navigator,[由于不方便截图,文字描述]选择Window->Show View->Other->Navigator]
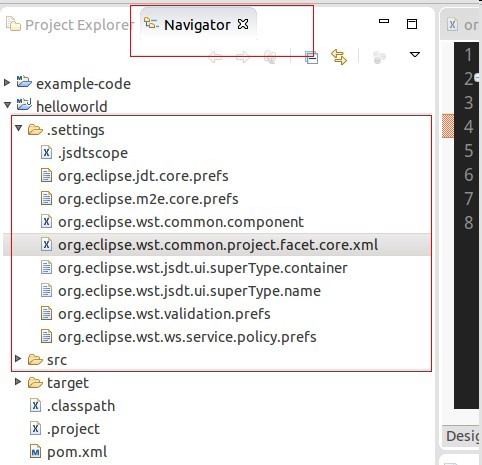
1.将org.eclipse.wst.common.component配置文件中的project-version的1.5.0修改为1.6.0

2.将org.eclipse.wst.common.project.facet.core.xml的jst.web对应的version修改为2.5
这样,我们的maven项目准备工作就做好了,下面我们开始编写SpringMVC的程序吧!
2.构建SpringMVC工程
2.1 添加Spring依赖包
用Maven POM Editor打开pom.xml,然后选择Dependencies视图,在Dependencies下点击Add
Spring的依赖包:
    Group Id: org.springframework
    Artifact Id: spring-web
    Version: 3.2.5.RELEASE
添加完毕后需要将远程包加载到本地来,右键项目根路径Run As->Maven install
如果报错-Dmaven.multiModuleProjectDirectory system propery is not set. Check $M2_HOME environment variable and mvn script match.
可以设一个环境变量M2_HOME指向你的maven安装目录
然后在Window->Preference->Java->Installed JREs->Edit
在Default VM arguments中设置
-Dmaven.multiModuleProjectDirectory=$M2_HOME
2.2 编写web.xml和spring-mvc的xml
web.xml 如下:1
2
3
4
5
6
7
8
9
10
11
12
13
14
15<?xml version="1.0" encoding="UTF-8" ?>
<web-app xmlns="http://java.sun.com/xml/ns/javaee"
xmlns:xsi="http://www.w3.org/2001/XMLSchema-instance"
xsi:schemaLocation="http://java.sun.com/xml/ns/javaee http://java.sun.com/xml/ns/javaee/web-app_3_0.xsd"
version="3.0">
<servlet>
<servlet-name>spring-mvc</servlet-name>
<servlet-class>org.springframework.web.servlet.DispatcherServlet</servlet-class>
</servlet>
<servlet-mapping>
<servlet-name>spring-mvc</servlet-name>
<url-pattern>/</url-pattern>
</servlet-mapping>
</web-app>
spring-mvc-servlet.xml 如下:1
2
3
4
5
6
7
8
9
10
11
12
13
14
15
16
17
18<?xml version="1.0" encoding="UTF-8" ?>
<beans xmlns="http://www.springframework.org/schema/beans"
xmlns:context="http://www.springframework.org/schema/context"
xmlns:mvc="http://www.springframework.org/schema/mvc" xmlns:xsi="http://www.w3.org/2001/XMLSchema-instance"
xsi:schemaLocation="
http://www.springframework.org/schema/beans
http://www.springframework.org/schema/beans/spring-beans-3.0.xsd
http://www.springframework.org/schema/context
http://www.springframework.org/schema/context/spring-context-3.0.xsd
http://www.springframework.org/schema/mvc
http://www.springframework.org/schema/mvc/spring-mvc-3.2.xsd">
<context:component-scan base-package="cn.springmvc.controller" />
<bean id="viewResolver" class="org.springframework.web.servlet.view.InternalResourceViewResolver">
<property name="prefix" value="/WEB-INF/views/" />
<property name="suffix" value=".jsp" />
</bean>
</beans>
需要在WEB-INF目录下创建views目录并创建HelloWorld.jsp文件1
2
3
4
5
6
7
8
9
10
11
12
13<%@ page language="java" contentType="text/html; charset=UTF-8"
pageEncoding="UTF-8"%>
<!DOCTYPE html PUBLIC "-//W3C//DTD HTML 4.01 Transitional//EN" "http://www.w3.org/TR/html4/loose.dtd">
<html>
<head>
<meta http-equiv="Content-Type" content="text/html; charset=UTF-8">
<title>Insert title here</title>title>
</meta>
</head>
<body>
<h1>message:₵{message}</h1>h1>
</body>
</html>
并且需要在src/main/java下建立一个控制层,包名cn.springmvc.controller,类名为Hello.java
1 | package cn.springmvc.controller; |
运行程序
右键项目根路径Run As->Run On Server->Next->Finish
运行结果如下:
